Setting up Hasura/local development
In week 2, last task was to set up Hasura platform on my local machine.

Hasura uses docker based deployment of apps on its server. Kubernaties is the tool to manage docker container of custom application on the virtual machines.
The requirement of hasura platform on our local machine is because of our local environment and production environment should be same so that there shouldn’t be any problem when we deploy our application on the remote servers, all things are tested first on the local hasura platform.
On the hasura platform, each application deployed as docker image, which contains separate virtual machine so that no other process can conflict with the processes of the application. Application packed in docker containers so that its resources are limited and it won’t affect the whole giant server. The thing we need to install was the platform and sync the basic docker image, which contains configurations and other required things to make the platform work for us.
Pre-requisites:
First thing was to install VirtualBox and for that we need a system with atleast 4GB RAM and 64 bit Linux OS installed on it. As I told in my previous blog, my system have the recommended configurations.
Why VirtualBox
VirtualBox is a general-purpose full virtualizer for x86 hardware, targeted at server, desktop and embedded use. We can run various operating system in a system by creating virtual machines. The need of VirtualBox tool is for creating and managing the virtual machines during the development of our application.
The next thing was hasuractl developed by hasura itself, which contains all the commands that are necessary for installation of platform.
After that, install kubectl , which is a tool of kubernaties.
I followed instruction and links for the required tools mentioned on local-development repository of hasura on Github.
Starting Hasura
Login to hasuractl using the credentials of beta.hasura.io

Start the local server with command hasuractl local start
Please note that it will roughly download 1 - 1.5 GB docker image from internet.
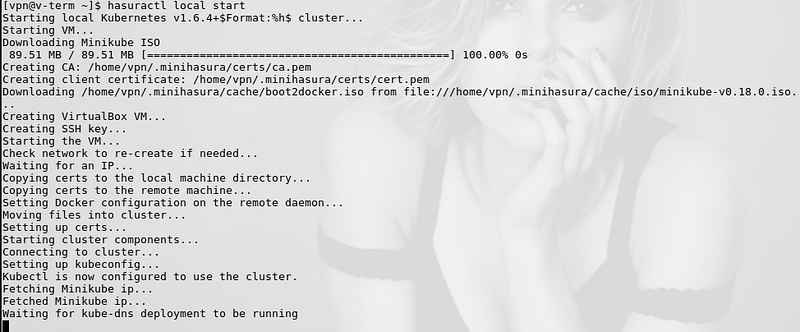


It may take a long time to finish depending on the speed of your internet connection.
The command exits by pointing you to a url to login to the console.

You can check the pods using command kubectl -n hasura get pods .


If any error occurs such as EOF error, press ctrl+c and use the command hasuractl local clean and then hasuractl local stop . Wait for 2 minutes and start again. It clean the local machine but not delete the downloaded files.
If you want to delete the local virtual machine, use the command hasuractl local delete.

When all thing done, finally you can login to the console.
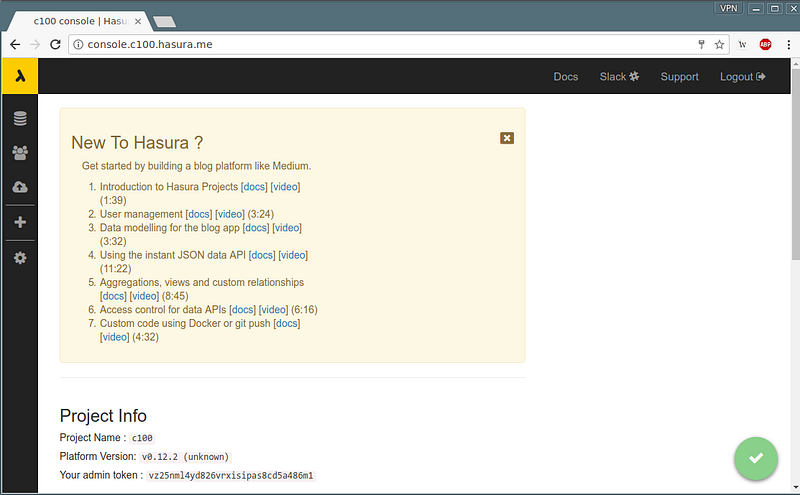
Now we have our local platform well set, we can continue our project.


Comments
Post a Comment